Simple Rainwater Collection Setup
- By : Sarah
- Category : Off Grid Utilities
- Tags: set-up, water collection
We have been hauling water from the stream much of the time we have been living here. Over the winter, the plan had been to melt snow on the constant burning wood stove. We thought winter would be much easier for water collection. This plan was baffled twice. First, we had to leave town unexpectedly and our drinking water filter froze, second it didn’t really snow. A Maine winter with barely any snow. It is amazing how much trouble the lack of snow caused. To get to the point: we need a more stable source of water.
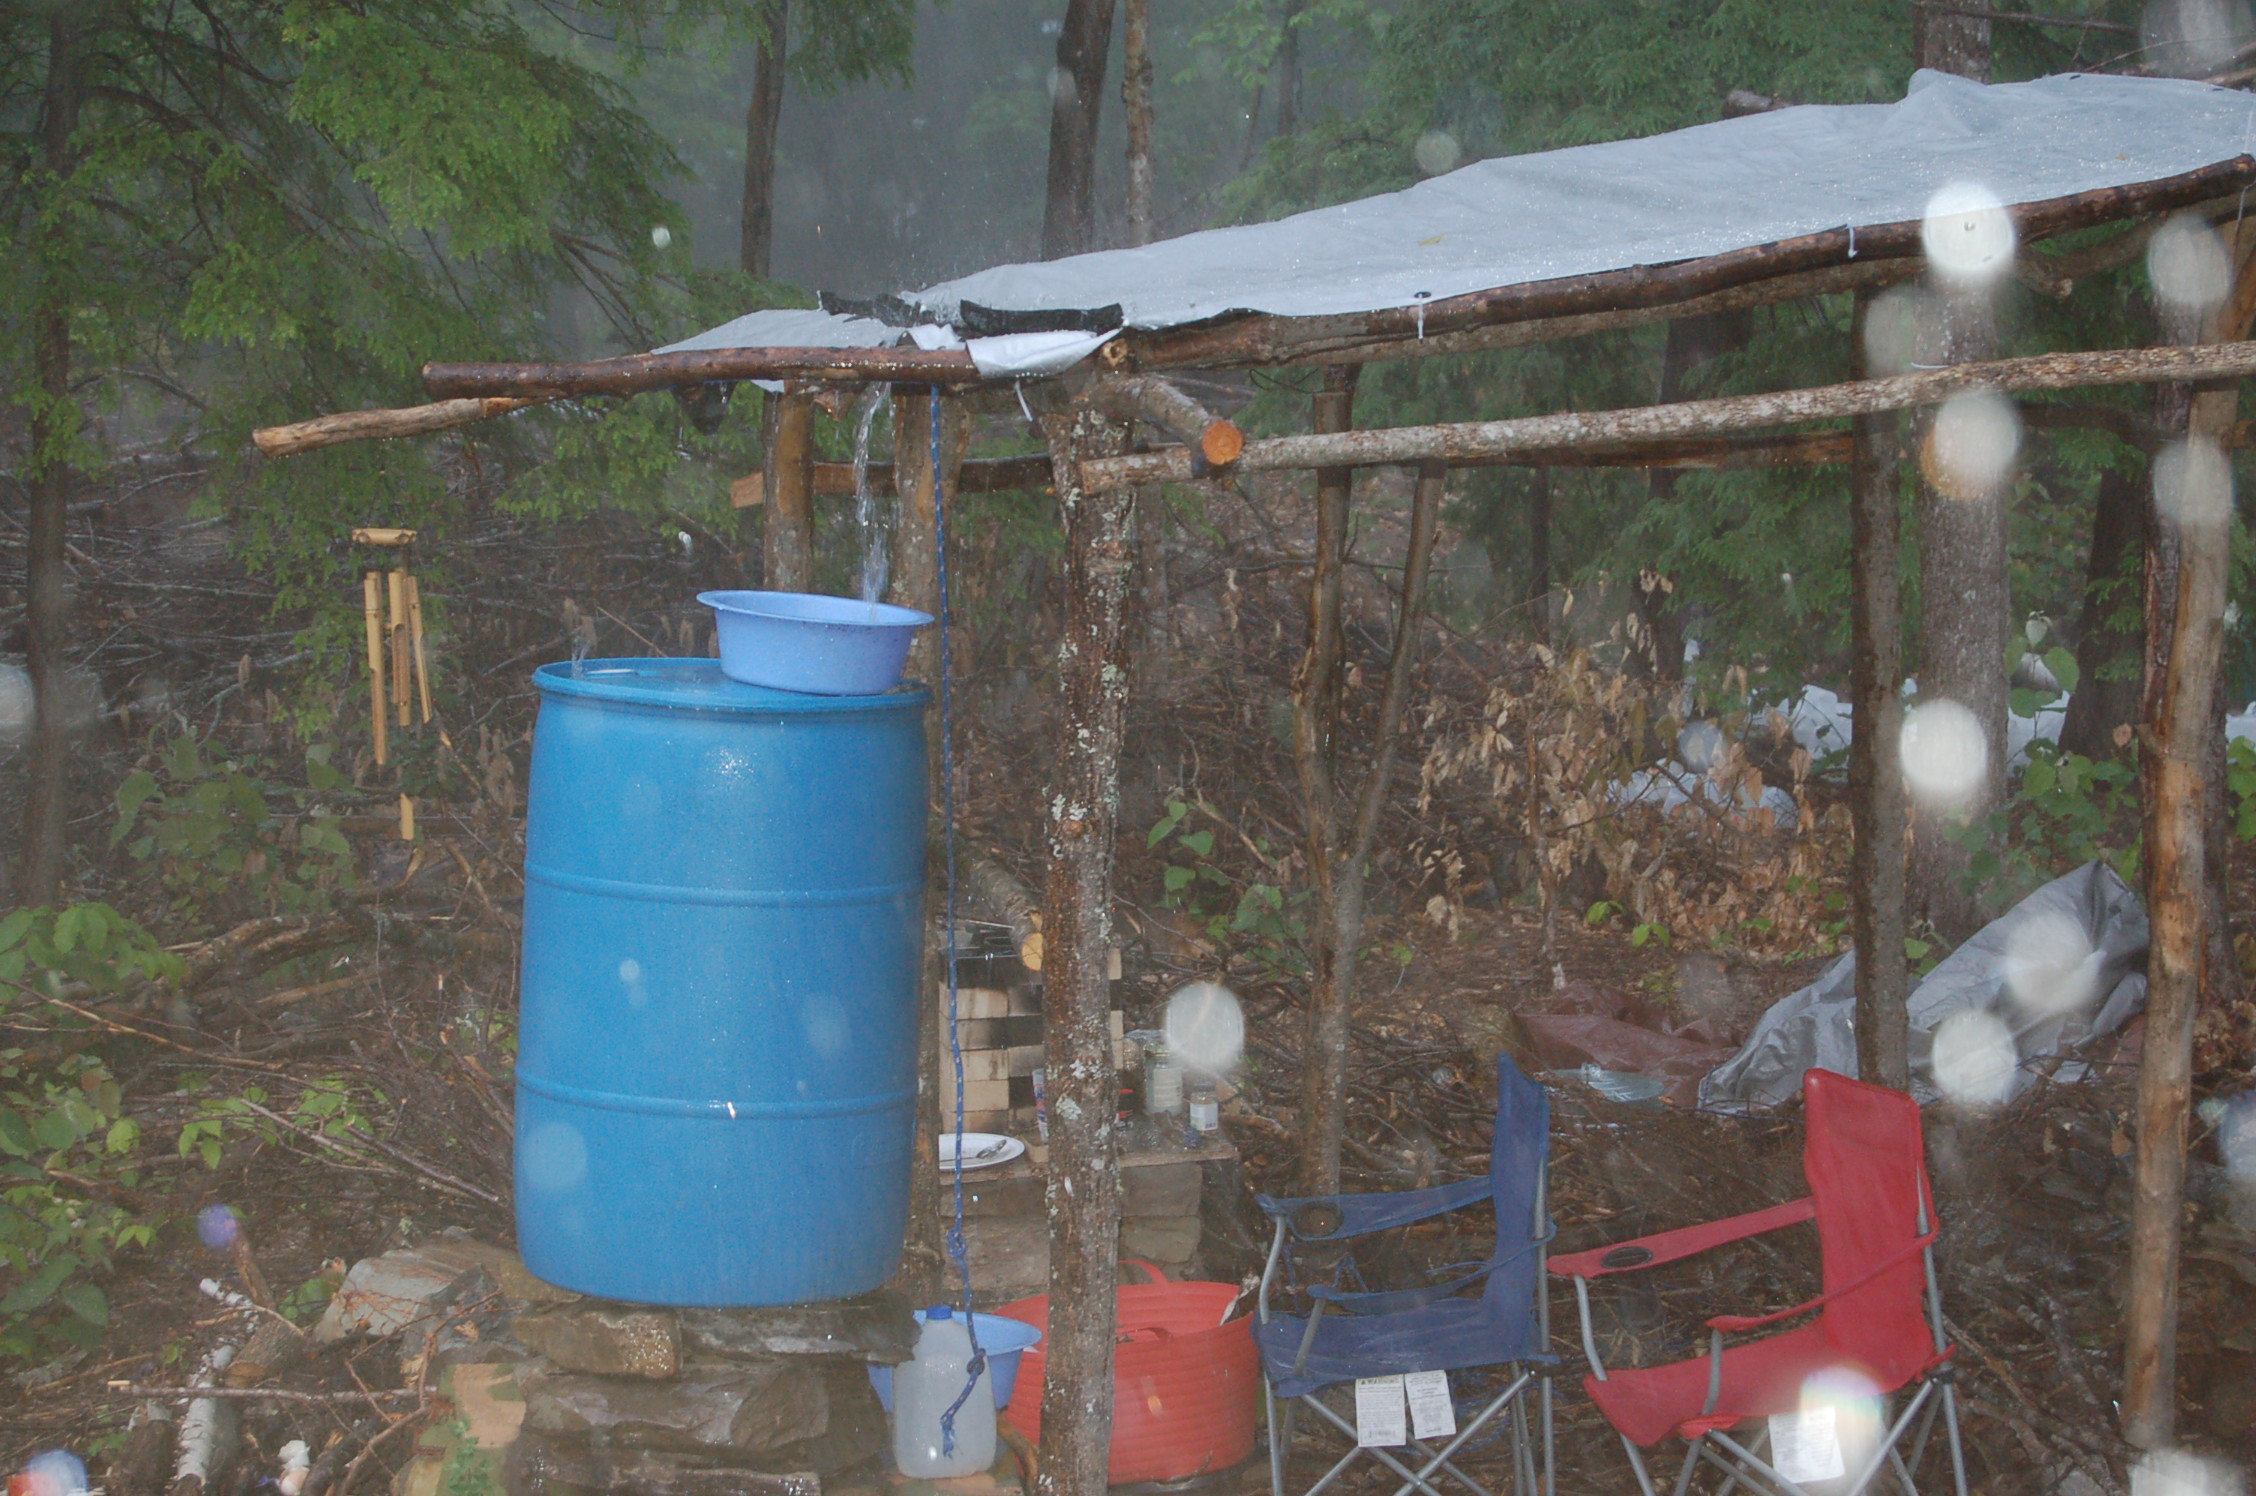
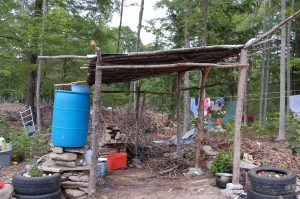
This plan for a water source will be good until the freeze. I highly doubt we will get as little snowfall as we did last winter, so I’m betting on that for water over the winter. The plan is to collect rainwater off of the roof of the outdoor kitchen and fill a 55 gallon water barrel. It may not be a lot of water, but with the amount of rain we get here, it fills continuously throughout the warmer months. We also do not wash laundry at the homestead, so that cuts down dramatically on how much water we use.
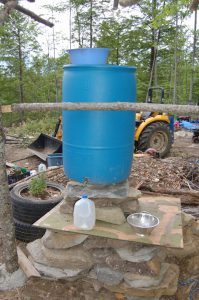
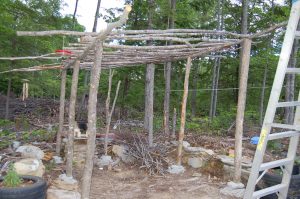 The first step is to build the kitchen frame, the project I posted last week. Once the frame is up, you need a base for the rain barrel. It has to hold quite a bit of weight, so it has to be strong. I walked around the property and found the biggest flattest rocks I could find and still move, and stacked them up for the base. I added a piece of plywood between the rocks so that I would have a flat surface to put pots and pans down on while they were filling up.
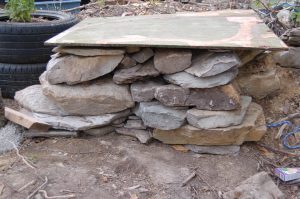
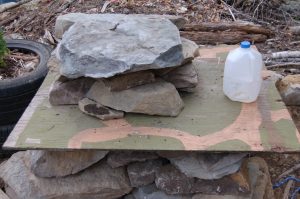
Add a few more flat rocks, and the base is ready. I wanted to be able to easily fill the water jugs that we use so often, so I stacked the rocks as high as the jug.
The rain barrel will also need some sort of a funnel to catch the water as it pours off of the roof. Since I am not using a gutter system with a perfect pour spout for the water, I chose a rather wide bucket to catch as much water as possible. There is also a screen over the opening of the rain barrel to keep leaves and particles out of the water.

Now we can put the barrel up onto the base.
 The roof for the frame will made out of a tarp that i have modified a little bit. The idea behind the modification is to direct the water that runs down the tarp into the rain barrel. For this, I used old juice bottles cut into “L” shaped pieces. I know that the clear plastic is hard to see, but the cuts are really simple. Cut off the funnel shaped top and then cut off the bottom. You end up with a rectangle. Cut the rectangle into 4 corner pieces and you’re done.
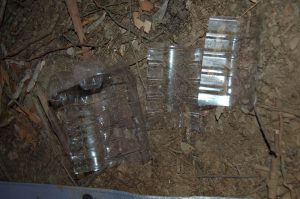
Then lined them up to create a sort of gutter to direct the water.
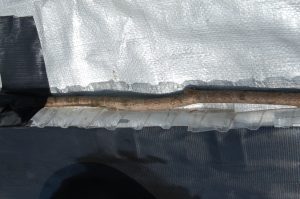
I attached and reinforced the plastic pieces with waterproof duct tape. In this picture, then water would be running from the top of the page to the bottom. The plastic pieces create a sort of wall the the water will hit and flow towards the “spout” which shoots it off into the rain barrel.
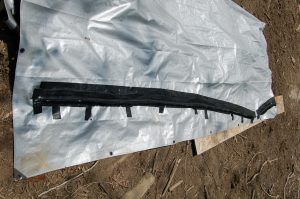
The line made by the plastic pieces slants downward, almost like a “V”, so that when the water runs off of the tarp it goes right into the top of the barrel.
Once this system was all put together, i attached it to the frame. I had initially used zip ties to attach the tarp roof, but it didn’t work that well and we had to reattach a couple times. I would suggest something stronger. Once the tarp was up, we had to line up the spout with the funnel that was attached on to the top of the rain barrel. This was a little annoying, but it works really well now.

For links to some more information, click here.

No Comments